What is Taskeng.exe? Taskeng Popping Up Randomly
Taskeng.exe is a process known as Task Scheduler Engine and is signed by Microsoft Corporation. The original taskeng.exe is an important system file, which makes it a high target for malware. It’s responsible for keeping track of tasks that are set to run at a predetermined time and call upon them when necessary.
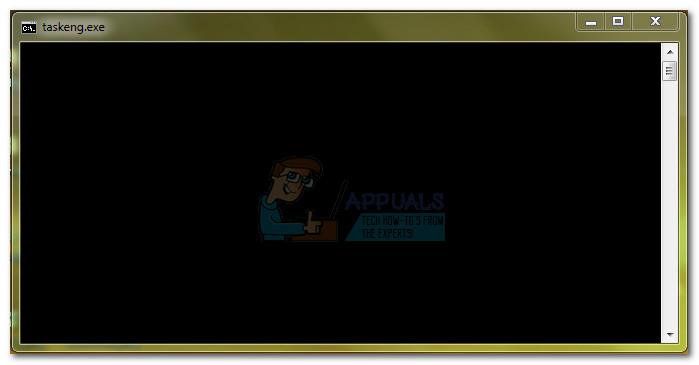
A lot of users have reported that a Taskeng.exe window pops up every once in a while. Depending on the circumstances, users will sometimes see an empty Taskend.exe window or a short message telling that a certain executable could not be found.
There are a lot of potential causes that will trigger this taskeng.exe error. Here’s a quick rundown of the most common occurrences:
- Corrupt Windows registry keys associated with taskeng.exe
- Files currently in use by taskeng.exe have been removed or modified by another program
- Ill-intended malware (Trojan Horse) is camouflaging itself as the taskeng executable.
Potential Security Risk
Like every other system file with enhanced permissions, taskeng.exe is the perfect disguise target for malicious programs created by cybercriminals. While the random pop up can very well be a pre-defined process scheduled to run automatically, it can also be a sign of a virus infection.
In any case, a blank black taskeng.exe pop-up is not a natural behavior – it’s either caused by a corrupt registry or by a malware infection. Trojans and other malware infections are specifically targeting processes like taskeng.exe to evade anti-malware detection.
The Taskeng executable is associated with a lot of errors, but the most culprits are MyWebSearch (a nasty browser hijacker) and RocketTab. Both programs are bundled with Trovi Download Manager and a few other ad-supporting programs that thrive on illegitimate practices. Although there’s a lot of malware confirmed to target taskeng.exe, the modus operandi is always the same – once the malicious file finds its way on your computer, it will immediately attack the Windows Run and RunOnce keys. As security experts have explained, there are some registry values in those keys that are set to run the taskeng.exe error at start-up or at fixed intervals.
Most of the time, the virus will inject ad pop-ups and other advertisements while trying to stay under the security radar. However, there are more aggressive versions of this malware type that will perform one or more of the following activities:
- Obtain administrative permissions.
- Gather information (shopping habits, keystrokes, or personal information) and sending the data to a third-party host.
- Slow the computer down by using your system’s resources to mine data.
- Disable your ad-blocking software and forcibly display different types of advertisements.
How to Determine if Taskeng.exe is a Virus?
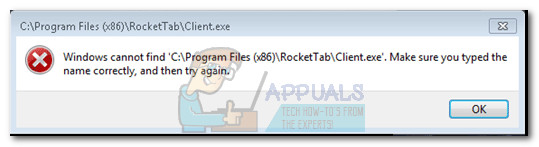
Perhaps the biggest giveaway that the taskeng.exe is actually infected is the error message. If you see a blank taskeng.exe popup accompanied by an error message similar to “Windows cannot find *executable file”, there’s a high chance that you’re dealing with a virus infection. You can be even more sure of this if you see any mention of RocketTab, GeniusBox or MyWebSearch in the error message.
If you see a similar message to the one above, there’s one more verification to make before you determine that you’re dealing with a virus infection – The legitimate taskeng.exe process is located in:
C:\Windows\System32
You can identify if this is the case by opening Task Manager ( Ctrl + Shift + Esc) and going to the Processes tab. Once there, locate taskeng.exe and check the Command Line associated with it or right-click on it and choose Open File Location.
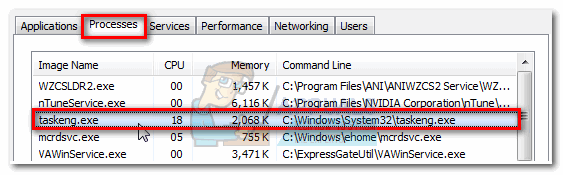
If the path is something else than C:\Windows\System32, you just identified the source of your malware infection. In this case, move straight to Method 3 to get rid of the virus.
Below you have a collection of methods that have successfully helped users struggling with random taskeng.exe popups to get rid of the issues. Follow Method 1 and Method 2 if you previously determined that the location of the process taskeng.exe process is in C:\Windows\System32.
Method 1: Disable User_Feed Synchronization
Some users have successfully removed the random taskeng.exe pop after disabling a hidden task in Task Scheduler. As it turns out, there’s a hidden task called User_Feed_Syncronization that is often responsible for this issue. Follow the instructions below to disable the User_Feed_Syncronization from Task Scheduler:
- Press Windows key + R to open a Run window. Type “taskschd.msc” and hit Enter to open Task Scheduler.

- On the left pane, right-click on Task Scheduler Library, expand View and enable Show Hidden Paths.

- Widen the Name column in the center pane and locate the User_Feed_Synchronization entry followed by a bunch of digits. Select the task and click on the History tab below.

- If these pop-ups are being caused by this particular issue, you should see a list of dates and times along with error reports. Then and only then proceed to the step below. If the list is empty, move to Method 2.
- If the history list is filled with error reports, click the Disable button on the rightmost pane.

In the event that this method didn’t resolve your issue, follow the method below.
Method 2: Disable OfficeBackgroundTaskHandlerRegistration
Some users encountering this particular issue traced the odd behavior to Microsoft Office; There’s a Get Office icon that auto-installs and can end up causing this problem.
Follow the steps below to disable OfficeBackgroundTaskHandlerRegistration and OfficeBackgroundTaskHandlerLogon from Task Scheduler:
- Press Windows key + R to open a Run window. Type “taskschd.msc” and hit Enter to open Task Scheduler.
- On the left pane, right-click on Task Scheduler Library, expand View and enable Show Hidden Paths.
- Click the little arrow next to the Microsoft folder then double-click on Office to see the entries associated with it.
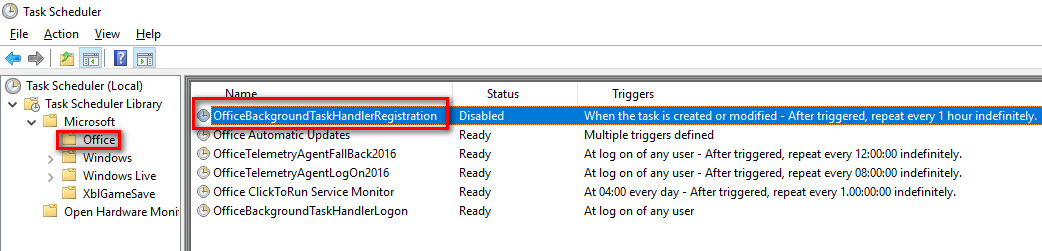
- Select OfficeBackgroundTaskHandlerRegistration and use the right pane to click the Disable button.

- Repeat step 4 with OfficeBackgroundTaskHandlerLogon.
Method 3: Scan your System with Malwarebytes
If you previously determined that you’re dealing with malware, let’s take the appropriate measures to get rid of the infection. You could do this in a number of ways, but given the fact that the infection can spread to other system files, deleting taskeng.exe is not really applicable. Instead, it’s recommended to run a system-wide scan with a powerful antivirus suite.
Most security products are capable of dealing with an infection such as this, but users have also reported false positives related to this issue. To minimize this risk, let’s use a solution that has been used successfully by most users dealing with this problem.

Malwarebytes is not only effective in dealing with trojans and viruses, it’s undoubtedly the best security software when it comes to removing adware and browser hijackers. Download the latest free version of Malwarebytes from this official link (here) and run the installer. Once the security is installed, open Malwarebytes and hit the Scan Now button.
Once the scan is complete, the threats will be automatically quarantined. Upon the next restart, Windows will automatically recreate taskeng.exe and every other system file that was affected by the infection.
Method 4: Removing Suspicious Tasks
If none of the methods shown above have helped you at all, we suggest you check the tasks you are suspicious about and remove them from the Task Scheduler. To remove the tasks, follow the steps below:-
- First of all, head over to this website (here) and download Autoruns program by Sysinternals.
- Once the file is downloaded you can extract it, if you don’t know how to extract a file check this article (here).
- Once it’s downloaded, right-click on the program and click “run as administrator”.
- Once you open Autoruns it should give you a license agreement window. Simply press “Agree”.

Accepting License Agreement - Now head over to the “Scheduled Tasks” section and Uncheck any suspicious task you see.

Disabling suspicious tasks by using Autorun - Restart your computer for a good measure and then check to see if the problem persists.